Review Cnc 3018 Prom Diy Mini Cnc Machine
Hobby Cnc Router kit
Getting started with Cnc machining can be expensive. The manufacturing plant or router isn't the only piece of equipment yous will need and there is a steep learning curve if you have no previous experience.
Well, practiced news, if you want to acquire the basics on a budget the 3018 cnc pro is ridiculously inexpensive and can be the perfect option to practice on and requite you that jump beginning in your new hobby.
Clarification
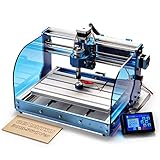
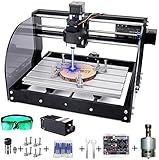
Genmitsu CNC 3018-PRO Router Kit GRBL Control 3 Axis Plastic...*
SainSmart Genmitsu 3018-PROVer Desktop CNC Router Machine...*
MYSWEETY ii in ane 5500mW CNC 3018Pro-Thou Engraver Machine, GRBL...*
ER Collet & Engraving bits
Preview
Clarification
Genmitsu CNC 3018-PRO Router Kit GRBL Control three Axis Plastic...*
ER Collet & Engraving $.25
Preview
Description
SainSmart Genmitsu 3018-PROVer Desktop CNC Router Machine...*
ER Collet & Engraving $.25
Preview
Clarification
MYSWEETY ii in 1 5500mW CNC 3018Pro-Grand Engraver Machine, GRBL...*
ER Collet & Engraving bits
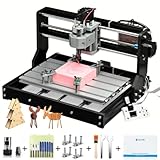
The machine I bought to review is the Genmitsu cnc 3018 pro sold on Amazon. (Showtime row, in a higher place)
The 3018 pro is a Chinese fabricated kit that is produced under different manufacturing names, merely they all appear to originate from the same factory.
It is sold as an 'engraving car', which is sort of like a disclaimer because it is not a particularly capable automobile, don't expect to be machining any blazon of metallic with it.
Only I would consider it to be a small cnc router for woodworking and general arts and crafts projects like my ER Collet racks.
A small box of engraving 'bits' are included that have a 20 degree inclusive bending, which are totally useless for annihilation other than engraving lettering.
These types of cutters are not designed for conventional machining operations. Then before I even begin this review I will advise that if yous buy this auto you volition need some better tooling.
This set, shown beneath, from the same company, Genmitsu, would be perfect to get started with, they have the same shank diameter equally the provided ER collet.
These types of cutter are designed for milling forest, which is what this auto should be used for.

SainSmart Genmitsu 10Pcs Nano Blueish Coat Finish Mill CNC Router...*
- ➤Cut Edge Diameter: 0.8 - 3.0mm (0.8/1.0/one.2/1.4/1.6/i.8/2.0/2.2/2.4/three.0mm), 10Pcs.
- : ➤Advantage: With sufficient flexural forcefulness and wear resistance, which ensure high piece of work efficiency. Sharp cut edge, milling, hole and plate edge, clean surface, dandy, no glitches.
- ➤Material: Using ultra-fine grained carbide material, with practiced milling and cutting performance.
- ➤Awarding: PCB, SMT, CNC, Mold, plastic cobweb, carbon fiber, difficult woods, printed circuit lath, and other precision parts processing.
- ➤Genmitsu CNC Bits Choice Guide: To learn more nigh how to choose the right $.25 to meet your needs, delight observe the Comparison Chart (CNC Bits Ownership Guide) at the Product Guides and Documents Section below.
Another useful accompaniment is this low profile vise, designed specifically for these types of machine.
Auction

Mini Low Profile Demote Vise Workholding Clamp Work Table for...*
- Use as a holding clamp and work tabular array for CNC engraving auto. The clamp is compatible with FoxAlien 3018-SE, Masuter and 4040-XE engraving automobile.
- The clamp can hold the engraving object by the edges without taking upwardly whatever engraving surface area.
- Information technology holds the object tightly and easy to adjust with screws.
- Product size: 20x8x4 cm/ 7.87"x3.15"x1.57"; Max. holding length: 13cm/ 5"
- The vise is made of loftier-quality aluminum, which is durable and stiff enough to stay steady while motorcar is running.
Unboxing the 3018 Pro Cnc Router
The box it gets delivered in (which is within the Amazon box) is surprisingly compact. It measures approx 17" X 9" Ten 8".

The contents are well packed in soft cream that is shaped to fit the components.

The outset parts I pulled out were these ii small stepper motors. There is a third stepper motor already mounted on the spindle assembly.

Here is the spindle mount assembly. It is constructed from a hard plastic, peradventure ABS.

I had read other reviews that suggested the plastic parts on these machines were 3D printed, but these were made in a plastic injection mold tool. The ejector pin marks are clearly visible.


The spindle motor comes with an ER11 collet extension already attached, complete with a 1/8″ ER11 Collet.

There is a 24V power supply, which looks very like to a laptop ability brick.

The control board comes mounted inside a clear protective case with a built in cooling fan.


There is besides an 'offline controller' supplied that can be used to manually motion the machine for setting up your datum positions. Programs can as well exist ran from this using the supplied micro USB carte.

This controller tin exist used to operate the machine without a computer connected to information technology. In fact you are not supposed to connect both the controller and the PC at the same time.
In that location are a couple of packs of hardware included, ane with the screws to build the machine and another pack with clamps for piece of work holding.


Some green rubber glasses are provided as well equally a USB drive and a modest box of engraving tools. The glasses are green to protect your eyes from the laser, if you add i. (Laser Module Review hither.) (laserGRBL software tutorial here)

There are a set up of four 'Y axis sliders' which bolt to the underneath of the tabular array and a 'Y axis nut seat'. These are besides made from injection molded plastic.

These sliders have to be the most disappointing parts in the kit. The base of each part is desperately warped and one has lumps on it that need removing so that information technology can be mounted properly.

The injection mold tool used to brand these parts was clearly damaged and poorly made. The warping is probably due to the mold non being cooled properly during use.


There is a bag of cables for the stepper motors and the spindle, and some small nix ties.

Next out of the box is the mill table. Information technology is fabricated from an aluminum extrusion and appears to be of skillful quality. This was covered in a protective picture.


Next out of the box are the structural components of the mill. These consist of aluminum extrusions for the sides and vertical cross braces.


Although the aluminum extrusions are of adept quality they are shipped total of fries from existence drilled and tapped. These all demand cleaning out, peculiarly from the threads so they don't get damaged when y'all assemble them.

The remaining structural components are made from Bakelite. These parts are for the front end and back of the base of operations structure and the vertical sides that support the spindle assembly.


These are the two leadscrews and the ground bars that the table and spindle travel on. These all appear to be very skillful quality.

Yous volition besides receive a small manual, which is as brusk as possible and includes the word 'Ubiety' !

3018 Cnc Assembly
Step 1

The construction of this motorcar is very straightforward, there are a few areas to exist careful with, which I volition point out when needed.
For stride 1 you need to clean the fries from the ends of the extrusions and remove the lump(south) from the base of the 'Y axis sliders'.
There is some flash on the moldings that need removing likewise. The emphasis here is to make them sit flat on the bottom of the car table.
I did not do anything about the warping on the base of these parts, when they are clamped to the machine table they flatten out.

Step 2

Step 2 consists of adding the Y centrality leadscrew and the motorcar table. There is an extra 'copper nut' to add together to the Y axis nut seat, this is added along with a leap.
The spring adds pressure betwixt the two nuts pushing them against the leadscrew threads to foreclose the table from rattling.


When clamping the Y axis sliders to the base of the car tabular array, it is a expert idea to set the table square to the frame.
I did this past sliding the table forward and trapping ii 1-2-three blocks between the table and the frame. So tightening the bolts to lock the tabular array to the sliders.


Step three

Step 3 consists of adding the get-go Bakelite vertical back up. The back up is positioned 46.5mm from the within of the dorsum frame.
This dimension is not disquisitional but when you add the 2nd back up information technology needs to exist the aforementioned distance.

If you don't accept any measuring calipers to friction match the two distances you lot tin can find something to agree between the frame and back up.
A small wooden dowel cut to length could exist used, but fix it in the groove of the extrusion and push button the back up against information technology while the bolts are tightened. So echo with the same dowel on the other side.

Step 4

In pace 4 you need to add the cross supports and 'slide rods' to the vertical support. I didn't finish tightening the bolts until the other vertical support was added.
The leadscrew tin can exist threaded in afterward the second vertical support is added. This tin exist added in pace 5.
Footstep 5

In this step y'all add the second vertical support. It is of import to position this the same distance abroad from the rear cross fellow member as the other side. Use calipers or a short dowel as mentioned earlier.
When these are tight, the support bars the spindle slides on can be tightened.
I tightened the right hand bolts with the spindle assembly moved over to the right. This ensures that the bars are ready at the right distance apart.
This was repeated on the left side past sliding the spindle associates to the left before tightening the left side bolts.
Then the X axis leadscrew can be added and the stepper motor can be bolted to the vertical back up.

Step half-dozen and Step seven

Footstep 6 is just sliding the spindle motor into the Z axis associates. The bolt needs loosening off and the molding needs prying autonomously. The motor is reassuringly tight in the associates, even with the bolt loose.

Step 7 consists of bolting the control board to the dorsum of the horizontal cross braces.

The final pace of the build is to attach the cables from the control board to the stepper motors and spindle motor. The manual shows a picture of the board and where each connection is located.


The X axis stepper motor is mounted on the vertical support, the Y centrality motor is mounted at the back moving the table.


Sale
Mini Depression Profile Demote Vise Workholding Clamp Work Tabular array for...*
- Utilise as a property clamp and work table for CNC engraving car. The clench is uniform with FoxAlien 3018-SE, Masuter and 4040-XE engraving machine.
- The clench tin hold the engraving object past the edges without taking up any engraving surface area.
- It holds the object tightly and easy to adjust with screws.
- Product size: 20x8x4 cm/ seven.87"x3.15"x1.57"; Max. holding length: 13cm/ 5"
- The vise is made of high-quality aluminum, which is durable and strong enough to stay steady while machine is running.
Testing the 3018 Cnc
Once you lot have your machine congenital information technology volition demand testing to make sure it operates and moves in the correct directions.
This tin can quickly be done by plugging in the offline controller to the control board and connecting the power supply.

Powering on the machine volition give yous some options to choose from on the offline controller screen. The options:
- Ctrl
- File
You tin can employ the Y+ and Y- buttons to coil through the options and the OK/Spindle push button to select your option.

Choosing the CTRL option will let you test the movements on your machine. The screen displayed will look like the picture below.

You should now be able to use the controller to movement the axes on your machine.
It is important to know which way each axis should move when you press each button so y'all do not run across the end limits and stall the stepper motor.
The next two pictures prove the direction the machine should motion when you printing the respective push button on the controller.

It is important to note that the Y centrality move refers to the direction the spindle moves, not the table. Merely because information technology is the table that is moved by the stepper motor, the tabular array should move in the opposite direction.
This means that when a Y+ axis move is commanded for the spindle, the tabular array will move in the Y- direction, it is the spindle that is moving in the Y+ management. (I hope that makes sense!)

To explain it another way, the spindle moves to the tiptop of the table for a Y+ movement.
So when yous press an centrality motion button the car will move a 'step' amount. This altitude is shown in the lesser right manus of the screen. This is specified in millimeters.

To change the step amount printing the Exit/Step push. To accept continuous movement toggle through to the largest step corporeality (10mm) and then press and hold the desired centrality management button.
To test the spindle, press the Ok/Spindle push button. To change the spindle speed press and hold the Ok button and press either the Z+ or Z- buttons.
The spindle rotation direction should exist clockwise when viewed from higher up.
To exit the control screen printing and concur the Leave/Stride push button.
The remaining screen is the File option, selecting this will evidence you lot the list of programs that are stored on the micro Sd card.

Use the Y+ and Y- buttons to scroll through the list of programs, press the OK button to select and the OK button again to start the machine and then it runs the program.
Pressing and belongings Exit/Step button will terminate the motorcar.
Cnc 3018 software
At present the software needs to be loaded onto your laptop or PC that you want to employ to run your 3018 cnc automobile.
The software for my machine came on a USB drive zipped upward using a .RAR file extension. I had to download free software called 7-Zip file manager to extract the files.
The USB drive had software for other devices, you only need to download the 'cnc3-3018pro_EN.RAR' file.

Open the 'software for control the machine(3axis)' binder and you lot will observe the sub-folder for the driver. Open up that folder and double click the file 'CH340SER'.
This volition install your driver, just follow the prompts and click install.
Next, open up the 'Grblcontrol(Candle_1.1.7 )' folder and double click the EXE. file as shown in the movie below.

This will open up the GRBL cnc command software. You can right click on the file shown above and create a shortcut,which you can drag onto your desktop.

At present yous have to decide your machines COM port. To practise this you have to open up the device manager on your PC and see which com port information technology is using.
Then you demand to choose the corresponding COM port in the Gbrl settings and set the baud rate to 115200 and click OK.

A very of import betoken to know is that the com port will non prove up in your device manager if you are not connected to the machine. The printed instructions neglect to mention this.
The machine needs to be powered up and connected to your laptop with the supplied USB cable for the COM port to show upwardly in your device manager.
You can then change to the correct port in the Grbl candle software settings.
As shortly as you enter the correct port the motorcar should be controllable with the Gbrl Candle software. Cheque out my total review here.
Running M Code on the 3018
If you are new to cnc machining it is important to note that the software provided with this machine volition not enable you lot to create a Grand Code program.
The Grbl Candle software but sends the commands to the machine using the G Lawmaking programme you load into it.
There are some test programs provided on the USB drive but I wanted to use some simple free software to prove what tin be washed by someone learning to employ a cnc machine.
And then to test the machine I created a new program using Inkscape to create my logo and a browser based plan chosen jscut to produce the 1000 Lawmaking.
Striking the link below to read the JSCut Tutorial.
In one case I had the G Code program done, I ran information technology using one of the supplied engraving cutters. Unsurprisingly information technology only cuts a fine line which is difficult to run into.
These supplied engraving cutters are a really poor choice to include. Information technology is hard to mill annihilation with them that looks good, which could be discouraging for a beginner.
I ran the program again using a ane/16″ ball stop cutter, you tin see the result in the moving picture below. It worked well on the lettering but some of the item was removed on the logo.
If you need some programs to exam your new Cnc automobile I take made my 'Spider' programs bachelor to download. Click the button below to get the details.
Determination
How well does 3018 cnc machine piece of work?
It works, I can say that much… I found it actually like shooting fish in a barrel to use the Gbrl candle software, I set up the tool, set the datum and it ran when I sent the program to the machine.
This machine is probably well-nigh equally easy an introduction to cnc machining you tin can go, at a really affordable price.
Are there whatever negatives to the 3018 cnc machine?
It vibrates, constantly. I'k sure this is normal for this type of machine.
Information technology vibrates when engraving a slice of plywood with a tiny tool, cut only .015″ deep. Although information technology wasn't every bit bad when I used a decent ball end cutter.
I have only tried a few simple programs then far, I am going to effort more involved projects in the future to see what can be washed on this automobile.

Do I recommend a beginner buying 1 of these machines?
Yep, if you lot are enlightened of its limitations and want to use it to larn and try some basic projects, information technology is perfect for this.
Information technology is fun and like shooting fish in a barrel to use, it has a really unproblematic construction and should be straightforward to fix, if and when parts article of clothing out. At that place are several upgrade parts available. My review of the upgraded spindle can be read here.
Cheap and educational are its primary selling points.
Auction
Genmitsu CNC 3018-PRO Router Kit GRBL Control three Centrality Plastic...*
- New Version: Genmitsu CNC 3018-PRO is an upgraded version of 3018. All components do non need to be positioned, which greatly reduces the difficulty of associates and improves the working accurateness. The base height is raised to 4cm for ameliorate stability. Capable of cutting all types of plastics, soft aluminum, woods, acrylics, PVCs, and PCBs, the Genmitsu can exist used on a wide range of projects and materials.
- Upgraded Power Adapter: UL Approved and out-of-the-box support for the drop in 20,000rpm Spindle, no demand to modify G-code to ramp up to full speed.
- Controller Software: The Genmitsu 3018-PRO uses GRBL, a high-performance open-source software for controlling movement, and runs on Arduino. Its dependability and simplicity make GRBL an industry standard, so at that place's no lack of support and resources available when you get stuck. Includes CARVECO Maker CAM Design Software and CANDLE for controlling your machine and running your GCODE design files.
- Optional Upgraded Parts: Super Size your 3018 CNC to a 3040 by getting a Genmitsu 3040 Y-Axis Extension Kit (B08P2S3JWP). The 3040 Aluminum Spoilboard (B08VNLP24C) and 3040 MDF Spoilboard (B08WZ8RV3Y) for this extension kit are besides available to buy.
- Support: Assembly Instructions and User Guide could exist found at the Production Guides and Documents Section below. If you get stuck, check out the SainSmart Resource Center (see at User Guide) or contact united states with any questions that arise.
Source: https://cncphilosophy.com/3018-cnc/
0 Response to "Review Cnc 3018 Prom Diy Mini Cnc Machine"
Postar um comentário