How to Beef Up Lowes Storage Shelves

A few years after Jocie and I moved into our home, the unfinished side of the basement looked like a we still hadn't completely unpacked. Boxes and bin and bags were piled across the floor. There was a small aisle leading to the washer / dryer, but forget making it over to the small pantry we used for dry storage. Thinking back, our basement was probably a fire hazard.
If you've ever felt like your home could be featured on the TV show Hoarders, you know that good storage is vitally important for every home. With the right shelves, bins and probably a yard sale, you can eliminate clutter and create a well organized space. I decided to remedy our lacking storage with some good 'ol DIY shelves. The shelves were built and installed in about five hours, and they were by far the cheapest solution I found.
Click here to jump down to where I provide step-by-step directions for building your own shelves or read on for a few thoughts about purchasing shelves.
Buying Basement Shelves
There are lots of great shelving options available, and my initial plan was to purchase some. I was looking for something strong, durable and cheap. I also wanted to get enough of them that our entire floor was clutter free. Unfortunately, nothing I found met all those criteria. All the pre-made options cost more than I wanted to spend.
I realize that not everyone is interested in constructing their own basement shelves. If that's the case, here are some aspects you'll want to keep in mind.
Material: Building your own shelves probably means wood construction, but purchased shelves are available in a variety of materials that provide different benefits. I'd suggest considering industrial-grade plastic or stainless steel shelving. Both materials won't degrade with moisture or rust. They resists mold, and should last many many years. A lot of the stainless shelves are quick to assemble / disassemble making them easy to pack up if you ever decide to move.
Adjustments: An important feature to consider is how you can customize your shelves. By changing the individual shelf height, you can ensure that there isn't any wasted space from a shelf being too big or too small. I've also found that those big, Rubbermaid bins are perfect for keeping things organized. Setting your shelf height to fit those bins is a good idea.
Max Weight: Purchased shelves will indicate a max weight per shelf. If you shop around, you will see some shelves that can accommodate over 100 lbs!
Build Your Own Basement Storage
OK. You've decided to build your own shelves- great! Now what do you do? I'm going to share how I did it, and offer up a few suggestions from my experience.
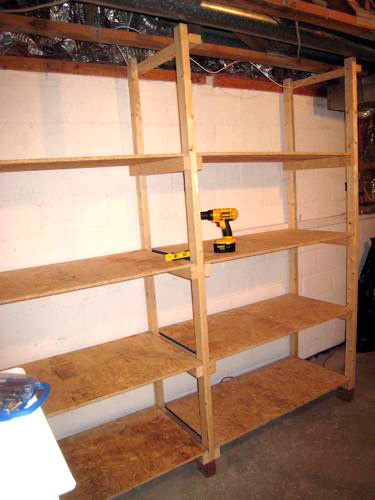
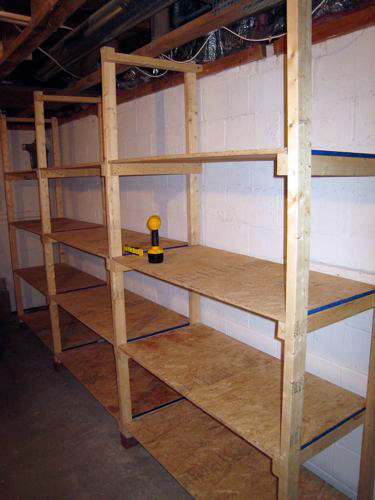
The final design for my storage solution was very simple. I built four ladder-esque supports with OSB shelves in between. The total dimensions are 12′ wide x 7′ tall x 2′ deep. Here are the required materials and costs.
Materials and Cost to Build Shelves
- 2″x3″x8′ Pine, dimensional lumber @ 1.38 x 15ea. = $20.70
- 5/8″ OSB, 4×8 sheets @ 5.94 x 3ea. = $17.82
- 3″ screws to secure ladder supports to joists @ 5.94 x 1 box = $5.94
- 1 1/4″ screws to secure OSB shelves in place @ 5.94 x 1 box = $5.94
- Nails to build ladder frames
- 4 spare bricks
The total cost to build these shelves was about $42 dollars (after Lowe's coupon).
Build the Supports
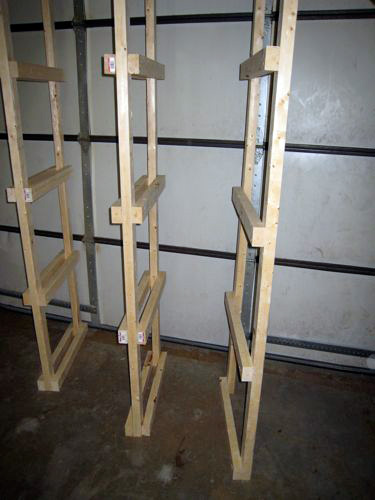
Find two straight 2×3's and line them up parallel to each other. Cut four other 2×3's at two feet long and nail them across the gap, spaced 18″ on center. Flip the support over and nail four more 2×3's at the same distance on the other side. Keep everything square so otherwise the OSB won't sit flat.

I made two of these supports with ladder rungs on both sides, and two more with ladder rungs only on one side. The double sided supports have shelves on both sides while the others act as end caps. Make as many of these supports as you need depending on the total width of your shelves. For instance, my shelves will be 12′ wide and I have four supports. I wouldn't suggest stretching out the supports any further than 4 feet on center.

Attach to Joists
Next, I anchored these supports to the floor joists above. You can see I've got webbed floor trusses, and I used 3″ screws to attach more 2x3s to the joists, and subsequently to the supports. Below, they sit on spare bricks to keep them off the floor. This is a really good idea in case your basement ever floods and it transfers some of the weight off the floor joists.

Cut OSB
Lastly, we cut the OSB into 2'x4′ sections with a table saw, practicing good table saw safety to avoid injury. The OSB serves as the shelf and spans the distance between adjacent ladder supports. It sits on top of the ladder rungs and is secured with 1-1/4″ screws. If you don't have a table saw or circular saw handy, get the sheets cut when you purchase them at your local DIY center.

Looking Back
OSB vs Plywood
One reader brought up some valid concerns about using OSB- specifically strength and potential moisture problems. OSB will delaminate if there's too much moisture and it doesn't have the best horizontal rigidity. 5/8″ plywood is a safer option but my shelves are still in great shape even after 3+ years holding some pretty heavy stuff. They sag but I'm not worried about them breaking, and my basement is relatively dry. Fred wrote a great OSB vs. plywood comparison if you want to learn more about the differences between the two materials.
Stronger Shelves
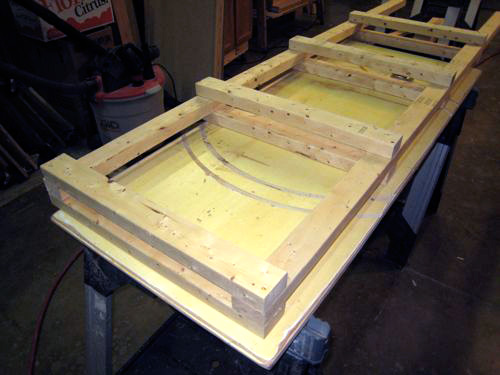
If you want to really buff up the structure, consider framing the OSB (or plywood) around the perimeter and adding strechers. It adds a small cost but greatly improves the shelf strength. You'll also lose a little space but the sacrifice is worthwhile especially if you plan on storing really heavy items.
Other "How To" Shelving Articles
- Sturdy Shed Storage Shelves
- Freestanding Workbench or Storage Shelves (Great for Stand-along Shelving Not Supported by Joists)
Final Thoughts
These shelves were easy to construct. You make a lot of the same cuts, there are no difficult calculations, and the shelves go together quickly. Best of all, these shelves are easy on the wallet. It would be tough to find better shelves for the price.
What do you think? What tips can you add?
This post originally ran in December, 2008. I took some time to update the post, add additional thoughts, and make the instructions easier to understand. I hope you find it helpful. I deleted all the original comments but made sure to address any questions, concerns or insights they brought to light.
Source: https://www.oneprojectcloser.com/how-to-build-inexpensive-basement-storage-shelves/
0 Response to "How to Beef Up Lowes Storage Shelves"
Postar um comentário